After you have created one or more projects, the DemoGo Project Library will display a list of all of your Projects and Groups, with options for managing them. At the top of the list, the ‘Create’ button allows the creation of new Projects/Groups.
Projects and Groups can both be renamed by double-clicking the name in the Project Library. This will also update the URL of your published demo.
Clicking on the pencil icon next to a Project or Group name will open a dialogue allowing you to also edit the Project/Group description. In the case of a Group, the pencil icon also allows editing of:
- Call To Action Button Text
This is the text that will appear on the Group Menu when it is collapsed. - Meta Description
This allows you to give your demo a meta description, which can be used by search engines to index your demo. - Meta Title
This title will appear on the tab above your browser window, and will be the title displayed when your demo appears in search results. - Google Analytics ID
Insert your Google Analytics ID here in order to track usage of your demo.
Managing Individual Projects
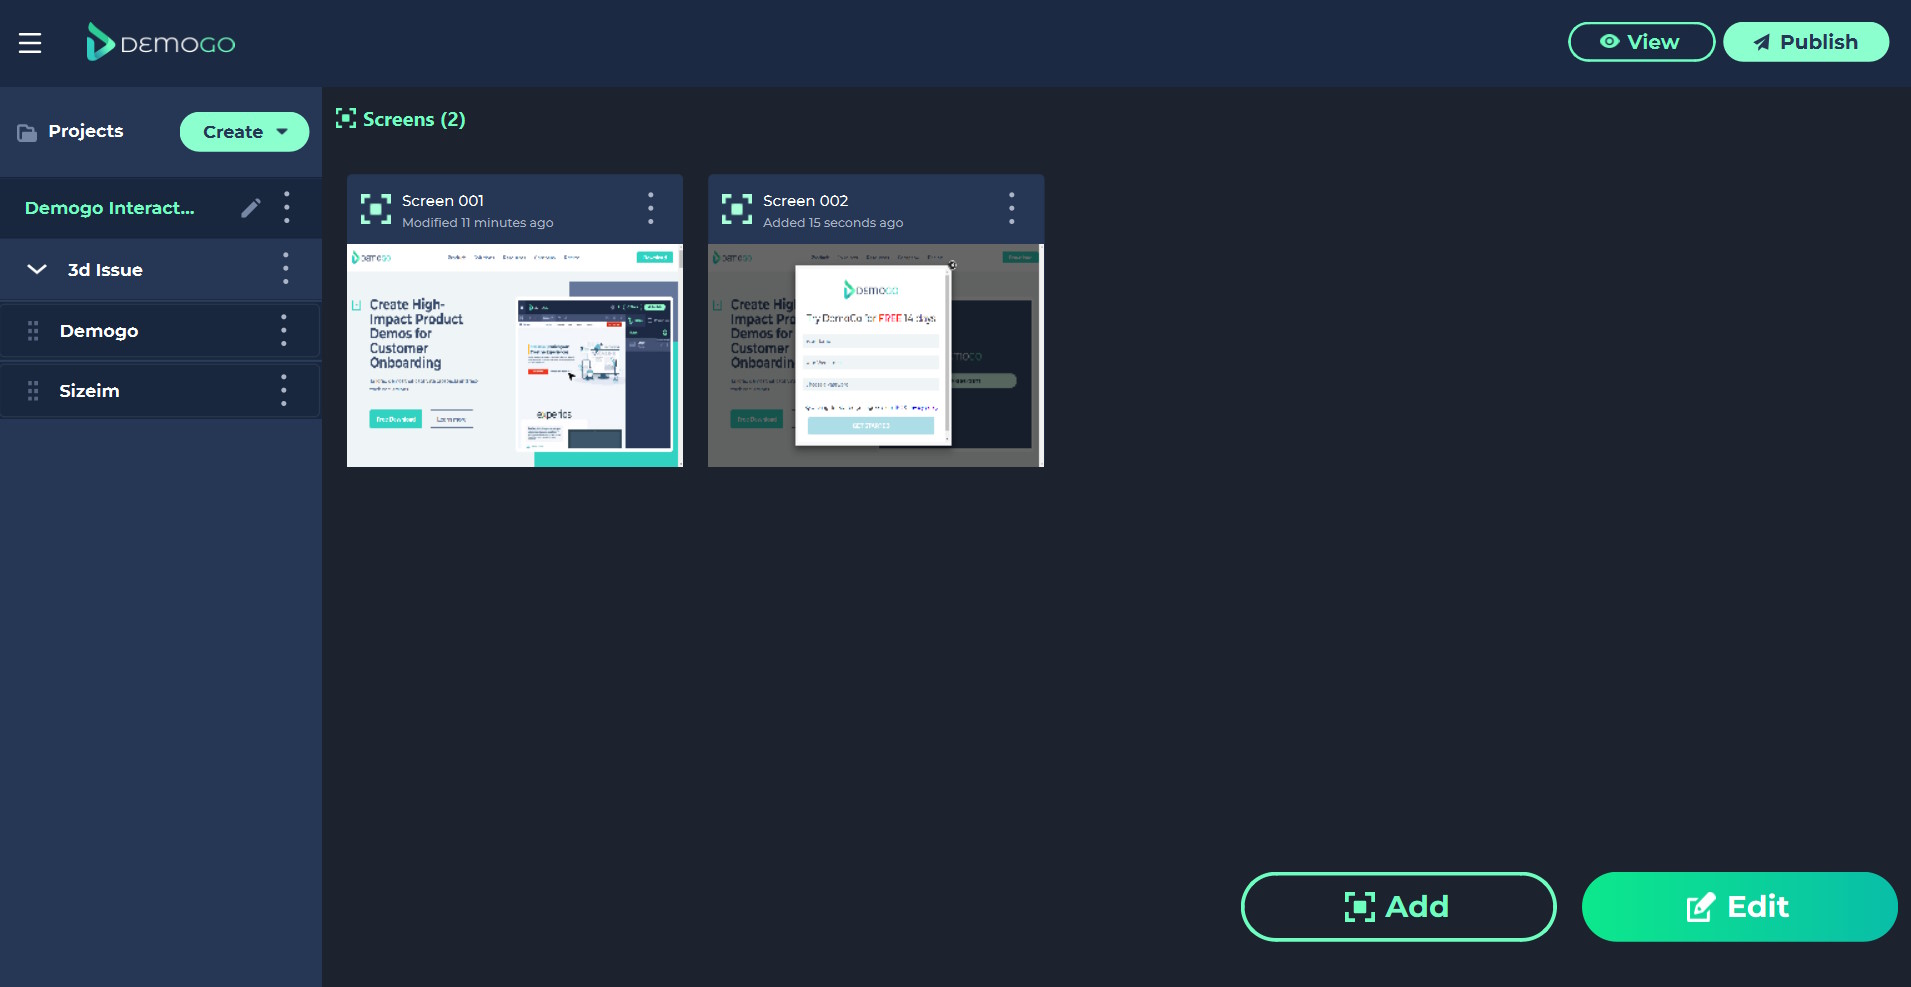
Clicking on an Individual Project in the Project Library will display an overview of the screens which have been captured in that project.
Clicking on the three dots to the right of an Individual Project name will open a menu containing the following options:
- Publish
Creates and publishes your demo to the location specified in the FTP wizard. - View
Opens a browser window and loads the live version of your Demo (only visible for published Demos). - Duplicate
Creates a copy of your project which can then be edited independently of the original. - Delete
Deletes your project from your computer and, optionally, your online demo. Once deleted from your computer, a project cannot be retrieved for editing.
Buttons in the bottom right of the DemoGo window allow to perform the following actions for the currently selected project:
- Add
Capture web pages for inclusion in your demo as screens. - Edit
Add steps and interactive elements to your demo.
Additionally, the three dots to the right of each screen title can be used to either replace, duplicate or delete that screen from the project.
- Replace
Opens the Screen Capture Tool, allowing for the recapture of the screen. - Duplicate
Creates a copy of the screen and places it as the next screen after the original. Any widgets attached to the original screen will also be duplicated into the copy. - Delete
Removes the screen from the project. This action is not undoable.
Managing Groups
Clicking on a Group title will display an overview of the Projects contained in the Group. The three dots to the right of each Project title can be used to either duplicate or delete that Project from the Group.
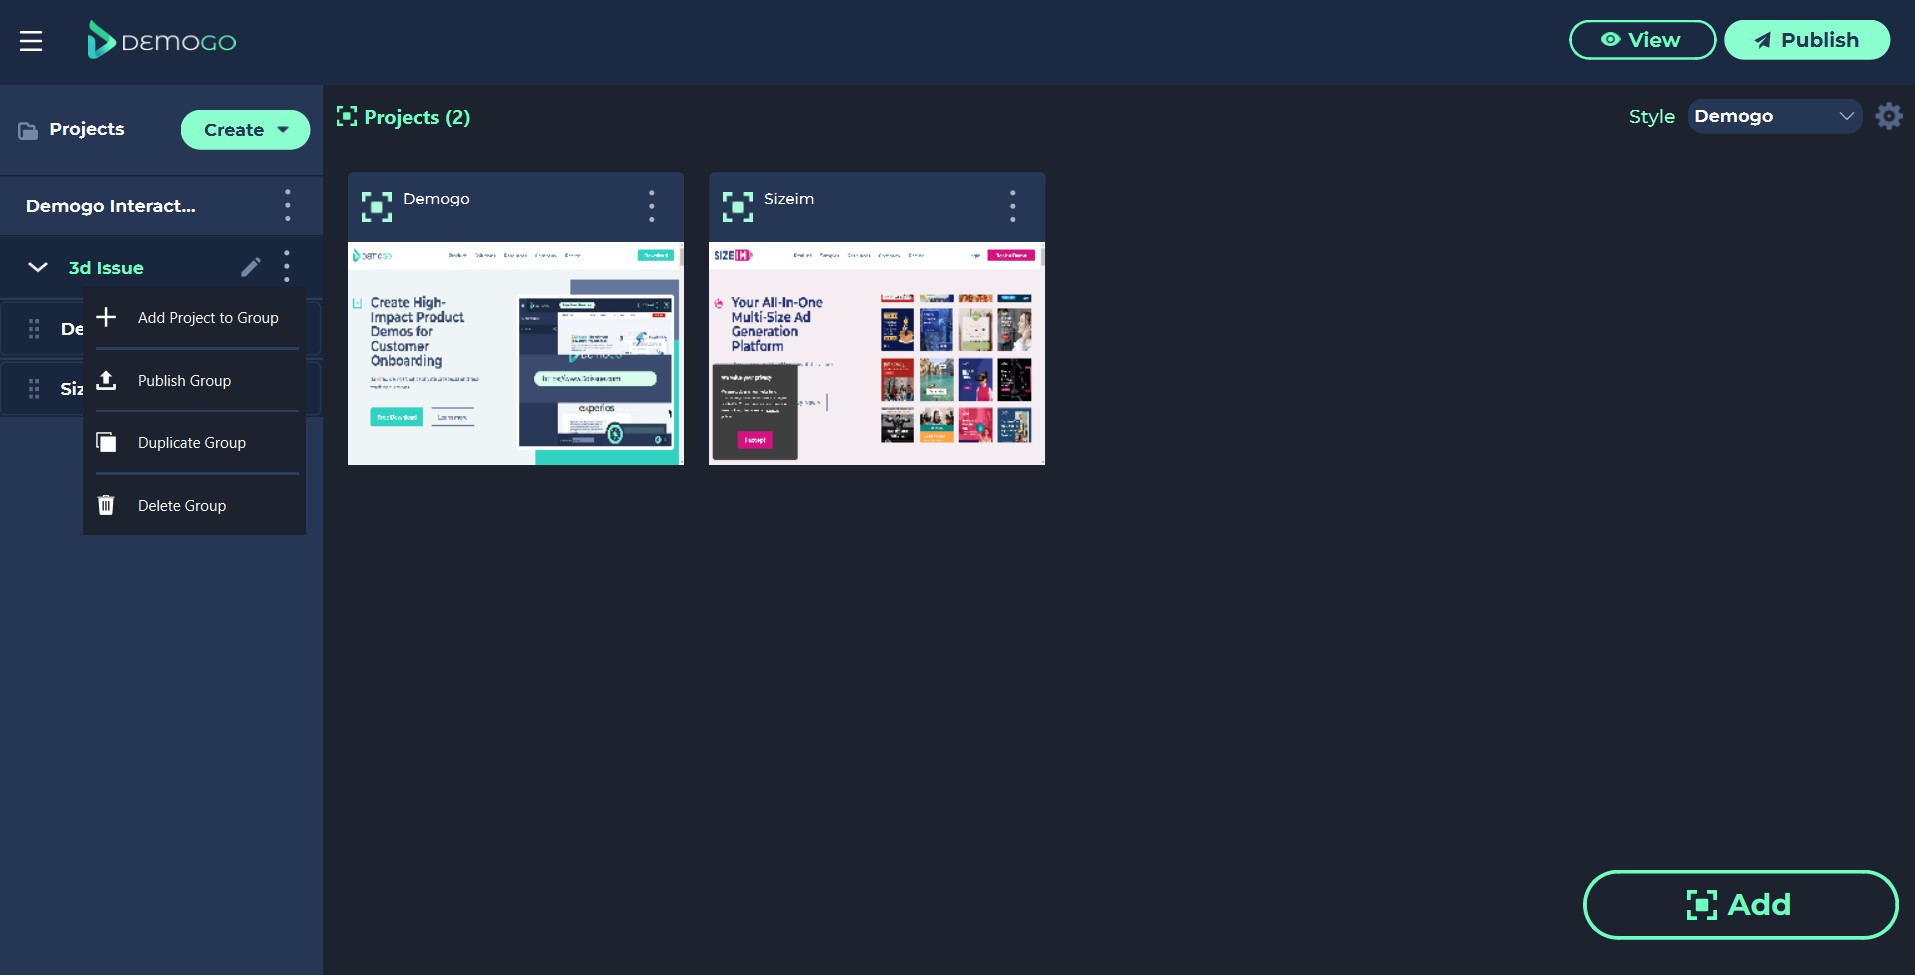
Clicking on the three dots to the right of a Group name will open a menu containing the following options:
- Add Project to Group
Create a new Project to be contained in the Group. - Publish Group
Opens a browser window and loads the live version of your Demo (only visible for published Demos). - Duplicate Group
Creates a copy of your Group which can then be edited independently of the original. - Delete Group
Deletes your Group from your computer and, optionally, your online Demo. Deleting a Group will also delete any associated Projects. Once deleted from your computer, a Group cannot be retrieved for editing.
For Projects within a Group, the menu only allows duplication or deletion of the Project.
When a Group is selected in the Project Library, a Project can also be created within the Group using the ‘Add’ button at the bottom of the DemoGo window.
Group Styles
Group Demos contain a Group Menu in the bottom left hand corner of the browser window, containing links to each of the Demos within the group. The Group Menu can be styled by clicking on the cog icon at the top right of the DemoGo window. Styles can be saved for quick access via the Style dropdown menu when creating future Demos.
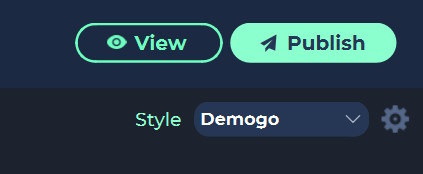
Clicking on the cog icon will open the Style Editor. Styles are grouped into three categories:
- Call to Action Button
These styles are applied to the Group Menu Call to Action when the menu is in its collapsed state.
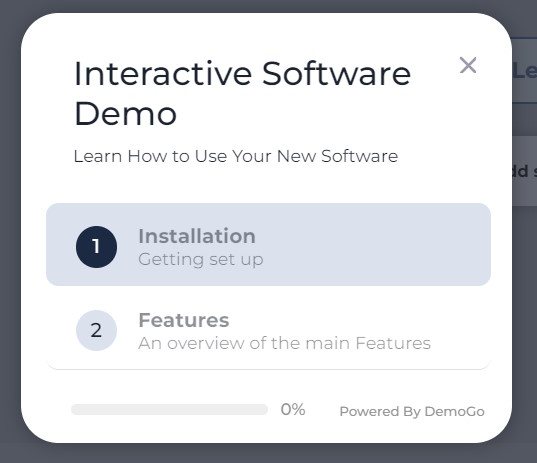
Collapsed Group Menu - Contents Panel
Applied to the Group Menu when it is open.
Expanded Group Menu - Background Overlay
The Background Overlay displays in front of your Demo when the Group Menu is opened, focusing the user’s attention on the menu.
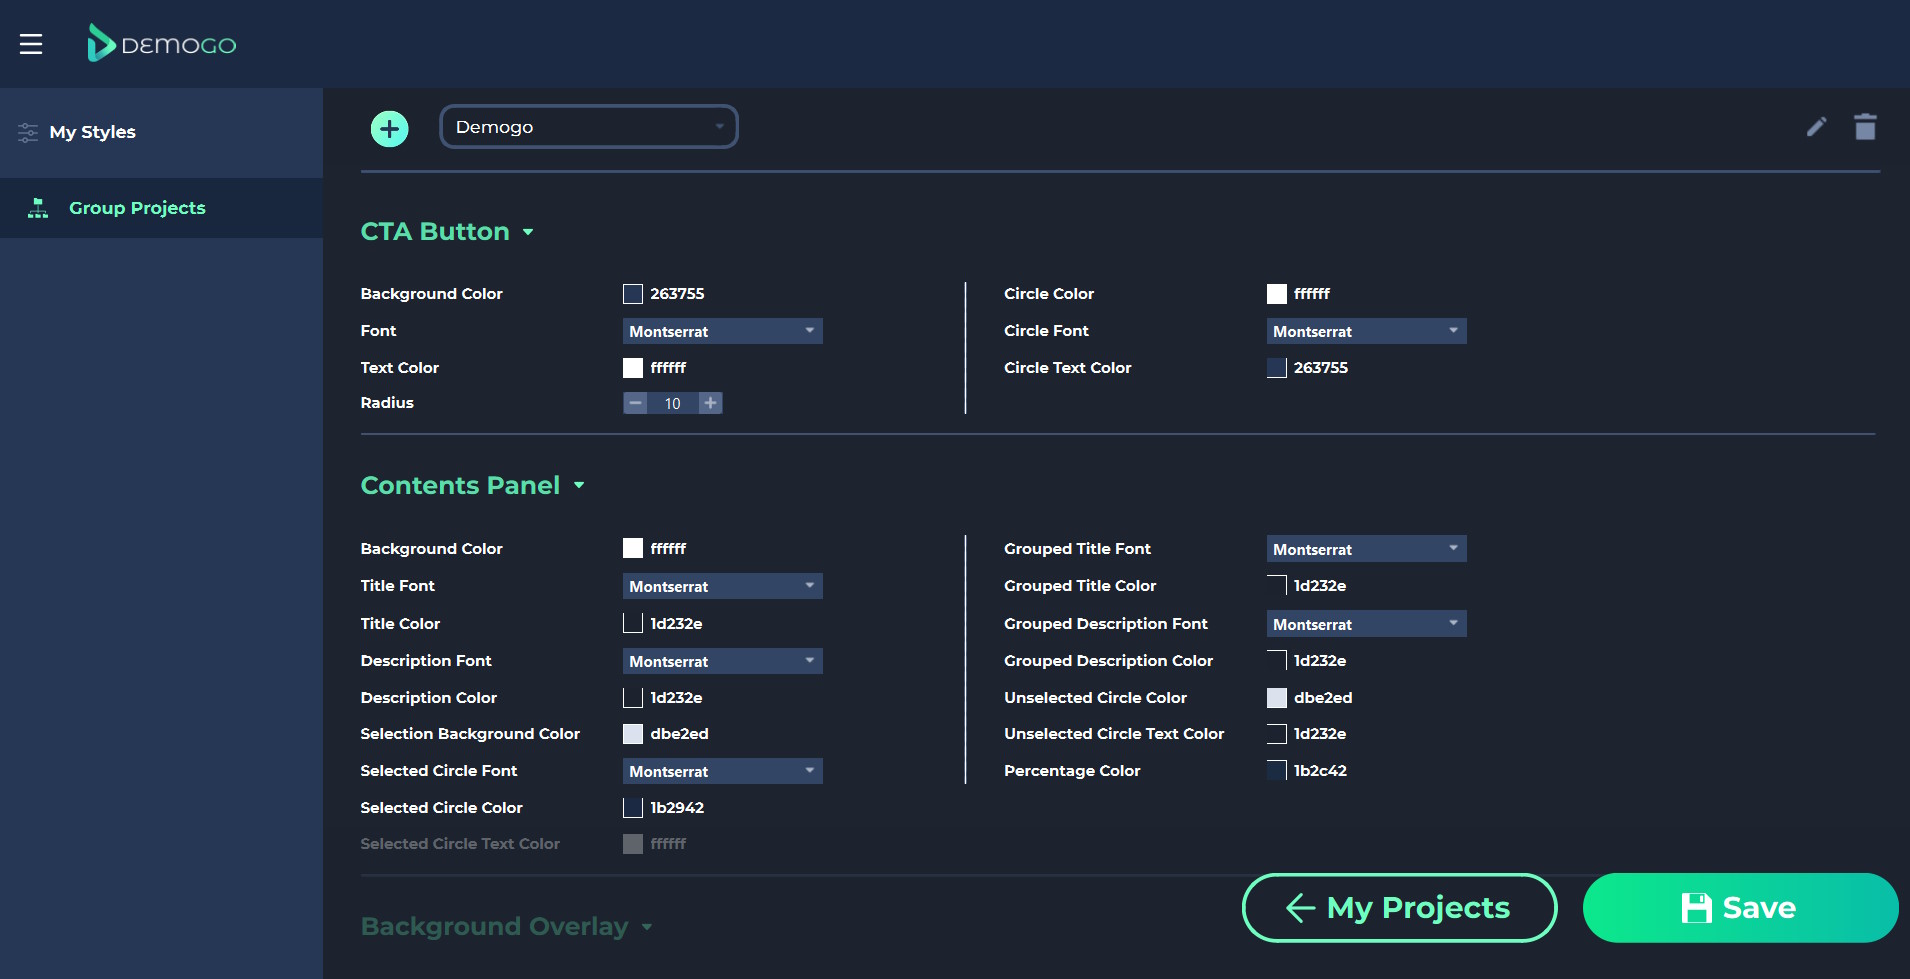
Once all styles have been set, click the Save button to apply them to your Group Project.